



CR cap testing is the point where a child-resistant pack stops being a drawing and becomes a claim. It is also the stage that most often surprises a brand, because the closure is usually fine and the pack around it is not.
PauPack makes child-resistant jars, tubes and closures for supplement, cannabis, household chemical and pharmacy brands, and we sit on both sides of this process: preparing units for the panel and answering the engineering questions that follow a result. This page walks the eight stages in the order they happen, with the detail that decides whether one round of CR cap testing is enough.
What CR Cap Testing Has to Prove
Two things at once, and they pull in opposite directions. The closure has to resist a young child for a defined period, and it has to remain openable by an adult, including an older adult with reduced grip strength.
A pack that fails the first test is unsafe. A pack that fails the second is a customer complaint with a returns cost attached. CR cap testing exists to hold both ends of that range inside one protocol rather than optimising for whichever panel ran first.
Where the Requirement Comes From
The obligation usually begins with the product category rather than with the pack. Household chemicals, certain medicines and cannabis products are the familiar examples, and the requirement is written into national rules rather than into a supplier's catalogue.
In the United States, the framework is set out under the Poison Prevention Packaging Act and enforced by the CPSC. Where the pack also carries a drug product, the closure becomes part of the container closure system, and the expectations recorded in the USP container closure chapter apply alongside the panel result.
The Eight Stages of a CR Cap Testing Program
The sequence below is the one we recommend to brands running CR cap testing for the first time. The order matters: a test run before conditioning produces a number that has to be thrown away.

Stage 1: Fix the Panel and the Sample Size Before Anything Is Made
Decide the panel size, the participant age bands and the test method in writing, because those three choices determine how many units have to be prepared. A panel of fifty children plus fifty adults, with spare units for damage, is the working assumption we use.
Prepare more units than the protocol needs. Rejected units, dropped units and units opened during briefing eat into a sample faster than most brands expect, and a short panel cannot be topped up with a different production lot.
Stage 2: Condition the Units
Conditioning is where CR cap testing becomes realistic. Units are held warm and cool, sometimes with humidity, so the liner and the thread arrive at the panel in the state the customer will meet them in.
PauPack asks brands for the storage condition the product will really see rather than a laboratory default. A closure conditioned beyond the market it ships to proves a point no customer asked for, and it can fail a pack that would have passed honestly.
Stage 3: Run the Child Panel
The child panel is the reason the category is regulated. Each participant is given sealed units with no instruction on how to open them, and the observer records attempts, methods and time rather than only the outcome.
Two details decide whether the result is defensible. The units must be presented in a randomised order so no participant learns from the previous one, and every unit must be traceable to its production lot. A result that cannot name a production lot is a demonstration rather than evidence.
Stage 4: Run the Senior Panel
The senior panel is run with instructions, which is exactly how a customer meets the pack. Participants read the opening direction, follow it and record whether the closure released without unreasonable effort.
This is where a strong child result gets tested. A closure with a demanding alignment sequence can score well with children and still fail adults who cannot see the arrow on the cap. PauPack reviews the opening graphic at this stage, not after the panel has reported.
Stage 5: Inspect Every Closure After Every Attempt
Once the panels are complete, the physical evidence matters as much as the score. Each closure is inspected for skirt cracking, thread deformation, liner displacement and any witness mark that shows how the unit was attacked.
| Inspection point | What it reveals | Typical consequence |
|---|---|---|
| Skirt and lugs | Whether the cap was pried rather than turned | Redesign the release geometry |
| Liner seating | Movement after repeated opening | Change liner material or thickness |
| Neck thread | Glass or plastic wear from torque | Recheck the neck finish tolerance |
| Cap body | Stress marks from one-handed twisting | Adjust material or wall section |
| Alignment marks | Whether the opening direction reads clearly | Redraw the cap graphic |
The table is deliberately physical. A result sheet that says fail without naming the part leaves the next round guessing, which is how brands spend three samples on one closure.
Stage 6: Repeat After Aging and Transit
A fresh-unit pass is one data point. The pack also has to survive storage and a pallet journey, and both change how a closure behaves. Aged units are re-run through the same sequence, and the pack is inspected after a transit simulation.
The packaging quality control checklist we use for releases carries the same logic: test the unit in the condition it will actually be in, not the condition it leaves the factory in.

Stage 7: Record the Failure Pattern, Not Just the Result
Most failures at this stage are patterns rather than events. If nine participants out of fifty pried at the same lug, the geometry near that lug is the finding. If three participants over sixty could not align the cap, the graphic is the finding.
| Failure pattern | Usual cause | First fix to try |
|---|---|---|
| Releases without the alignment step | Lug engagement too shallow | Deepen the lug or tighten the mould tolerance |
| Releases on a squeeze, not a turn | Skirt flexibility too high | Increase wall section or change material |
| Adult cannot open the pack | Alignment mark unreadable | Redraw the cap graphic and re-panel |
| Passes new, fails aged | Liner swell or thread creep | Change liner or neck finish |
| Inconsistent between lots | Moulding tolerance too wide | Tighten the closure drawing |
Read the pattern before ordering another sample. A second round run against the same drawing usually returns the same result, and repeating the panel without an engineering change is the most expensive way to confirm a number.
Stage 8: Release the Closure or Send It Back
The release decision belongs in writing, with the panel report, the conditioning record, the production lot and the closure drawing revision attached to it. That package is what makes the second production run defensible without repeating the panel.
PauPack keeps that record with the project. The quality management file holds the drawing, the certificate and the panel paperwork together, so a compliance question two years later is answered from a folder rather than from memory.
What Changes the Result Without Changing the Cap
Brands are often surprised that the result moves when the closure part number does not. Three things cause most of it: a change in the neck finish, a change in liner thickness, and a change in pack weight.
A heavier bottle changes the hand position the participant adopts, and a lighter liner changes how much torque the cap needs before it releases. That is why a closure is qualified against a complete pack rather than against a cap size, and why a bottle swap mid-project triggers a re-test rather than a note in the file.
What PauPack Prepares Before a Panel Test
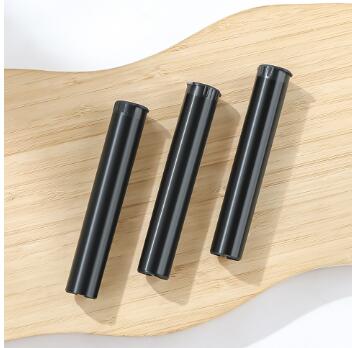
Before units leave for a test house, PauPack confirms the closure part number and its drawing revision, the neck finish on the bottle, the liner specification, the pack weight and the opening instruction as printed.
The child-resistant glass jar range and the child-resistant storage jar options show the closures we run most often for these programs, and the childproof caps testing standards guide explains how the panel rules are read in practice. When volume planning and compliance meet, the child-resistant packing MOQ survey shows what a compliant pack costs at different order sizes.
Send the pack, the closure part number and the market through the inquiry form, and PauPack will prepare a CR cap testing set with the drawing revisions attached so the panel can run once.
CR Cap Testing: The Ten Questions Buyers Ask Us Most
What is CR cap testing?
It is the panel procedure that shows whether a child-resistant closure actually resists opening by young children while still being openable by adults. In practice the test means running a defined sample through a child panel and a senior panel, then inspecting the closure for the damage those attempts caused. PauPack prepares those units.
How many samples does a CR cap testing program need?
Two panels, not two samples. The child panel is usually 50 children and the senior panel 50 adults, and each participant needs a sealed unit. PauPack prepares the units, the order of presentation and the record sheets so the test is run once rather than repeated for a procedural reason.
Who has to run CR cap testing?
The party making the packaging claim, usually with a recognised test house rather than in-house. A supplier can prepare a compliant pack and document it, but the claim belongs to the brand that puts the product on a shelf. PauPack supports the process and supplies the units.
Why does a cap pass on a bench and fail on a panel?
Because a bench test opens the pack the way an engineer opens it. A panel includes participants who twist with one hand, pry at the skirt, use teeth or simply give up, and the panel is designed by PauPack to record that range rather than an average grip.
Does CR cap testing change if the bottle changes?
It can. A closure is qualified against a specific neck finish, a specific liner and a specific pack weight, so moving the bottle can invalidate the result even when the cap part number stays the same. Re-test when any of those three changes.
What happens after the closure is aged?
Repeat the opening sequence on aged units. Liners swell, threads relax and a cap that released cleanly when new can stiffen after a warm hold. A single fresh-unit pass is not evidence for a two-year shelf life, which is why the aged pass sits inside every panel plan PauPack writes.
How long does the process take?
Panel scheduling usually dominates. Preparing units and conditioning them takes one to two weeks, the panels themselves run on the test house timetable, and reporting follows. Brands planning a launch around a CR claim should start before artwork is final.
Can a cap be too hard to open?
Yes, and that is the half buyers forget. A senior panel that cannot open the pack fails the product in the market, and a pack that is difficult for a customer is returned regardless of how well the closure performed with children.
What is recorded besides a pass or fail?
The attempt count, the method each participant used, the time taken, the closure condition afterwards and any damage to the skirt or liner. That detail is what turns a failed result into an engineering change instead of another sample round.
What should a brand prepare before contacting a test house?
The pack as sold, the closure part number, the neck finish, the intended age of the product and the claim being made. Arriving with those five items makes the panel a scheduled activity rather than a research project.