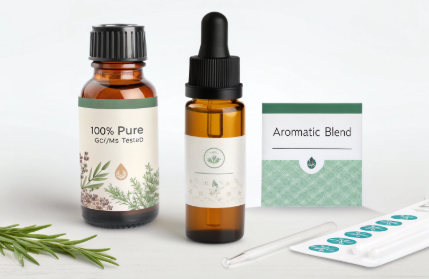
Creating aromatherapy oils is a blend of art and science—selecting the right essential oils, balancing their notes, and pairing them with a suitable carrier. Whether for stress relief, better sleep, or an energy boost, the right blend can transform both mood and skin.
To make aromatherapy oils, mix essential oils with a carrier oil following a dilution ratio (typically 1–5%). Use the 30/50/20 rule to balance scent: 30% top notes, 50% middle notes, 20% base notes.
Let’s explore how to build blends that smell amazing, feel luxurious, and deliver real therapeutic value.

How to make your own aromatherapy oil?
It’s easier than you think—with the right ingredients and measurements.
To make your own aromatherapy oil, choose 2–3 essential oils, dilute them into a carrier oil like jojoba or almond, and store the blend in a dark glass bottle. Shake gently before use.
Which carrier oil has the lowest impact on scent?
If you want your chosen essential oils to shine without interference, fractionated coconut oil is your friend. This carrier oil is virtually odorless, making it a popular pick for those seeking a neutral base. It’s also less prone to spoiling than regular coconut oil, and many aromatherapy enthusiasts prefer it for its light texture and long shelf life. The trade-off? It typically costs a bit more, but for pure, undiluted aroma, it’s often worth it.
How to safely test for skin sensitivity
Before using your aromatherapy blend more broadly, it’s important to check for any possible skin reactions. Simply combine a drop of your chosen essential oil with several drops of your carrier oil (like jojoba, almond, or coconut oil) and apply a small amount to the inside of your wrist or elbow. Wait 24 hours and watch for any redness, itching, or irritation. If your skin stays happy, you’re good to go!
How do I make my own infused oils?
Infused oils are a wonderful way to capture the essence of your favorite herbs and plants, and the process is delightfully straightforward.
Here’s a simple guide:
- Pick Your Plant:Start by selecting a fresh or dried herb—think lavender, rosemary, or even lemon balm.
- Prepare the Jar:Fill a clean glass jar halfway with your chosen plant material.
- Add Your Carrier Oil:Pour in a carrier oil, such as grape seed, olive, or coconut, until the herbs are fully submerged and there’s roughly an inch of oil above them.
- Steep in the Sun:Cover the jar with wax paper, then secure the lid. Slip the jar into a paper bag to shield it from direct light and place it in a sunny windowsill for 1–2 weeks. Give the jar a gentle roll every few days to encourage infusion.
- Strain and Store:Once infused, strain the oil through a cheesecloth into a clean container. Let the oil settle for a day, and then it’s ready to use.
Keep your infused oils in a cool, dark spot between uses—they’ll generally stay fresh for about a month.
Do you have to use essential oils for aromatherapy?
Not necessarily—aromatherapy isn’t limited to just essential oils.
Any plant extract that produces a distinct aroma can play a role in aromatherapy, whether it’s a pure essential oil, a floral water like rose hydrosol, or even a resin. As long as the scent comes from a plant and is used to influence your mood or well-being, it fits the bill.
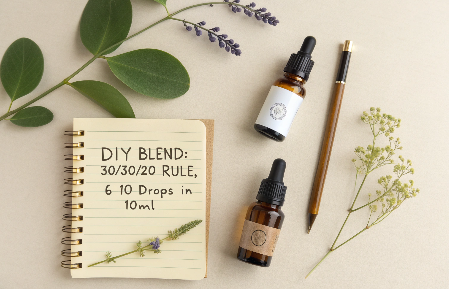
Dive Deeper: DIY Aromatherapy Blend Recipe
You’ll need:
-
10ml carrier oil (jojoba, fractionated coconut, sweet almond)
-
6–10 drops of essential oil blend (1–5% dilution)
-
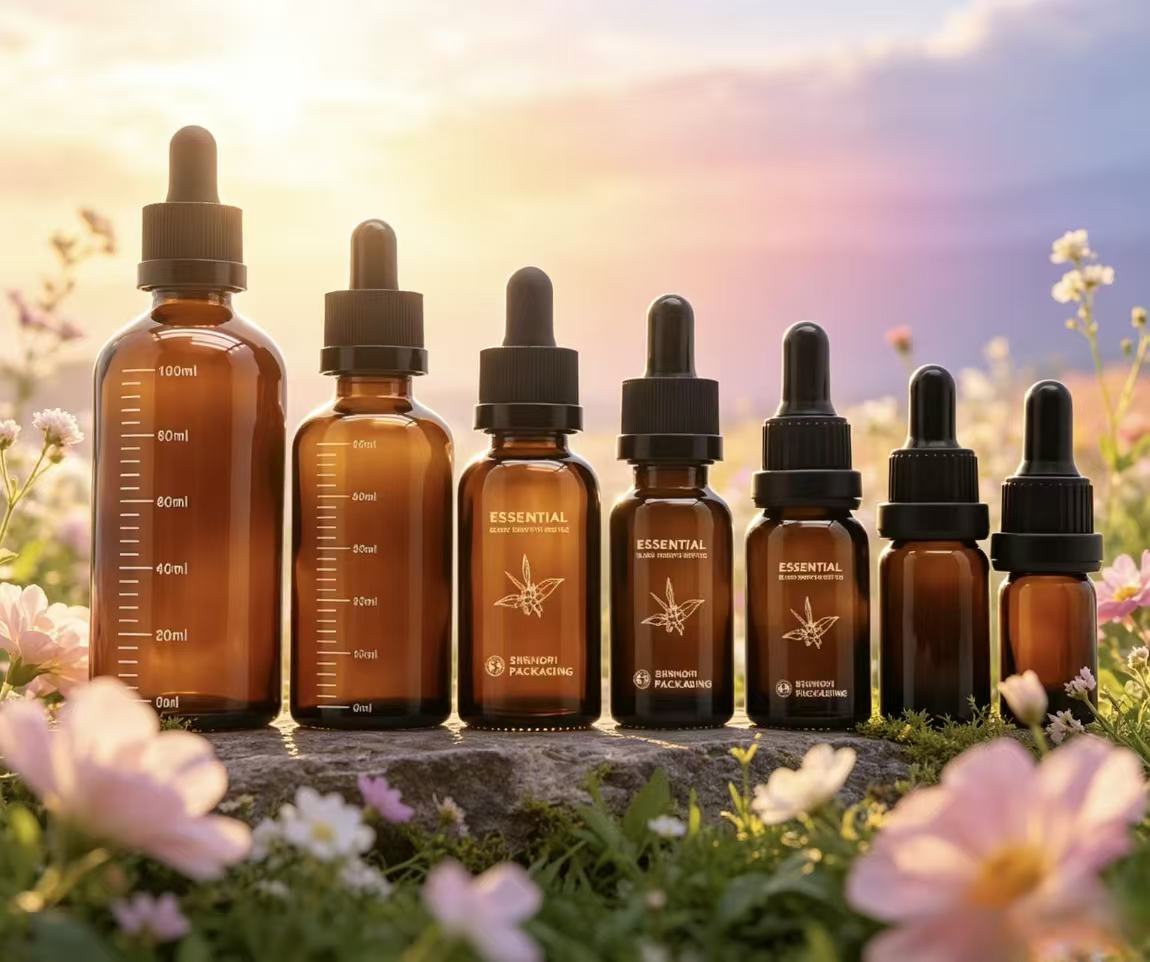
Amber or cobalt dropper bottle
Step-by-step:
- Choose oils by therapeutic goal (e.g., lavender + bergamot for calm).
- Use the 30/50/20 rule for balance (see next section).
- Blend oils first, then add to carrier.
- Shake gently and label (name, ingredients, date).
Dive Deeper: How Are Aromatherapy Oils Made?
If you want to craft your own essential oils from scratch, here’s a peek behind the curtain at how it’s done:
1. Harvest Your Plant Material
Start with fresh, high-quality plant material. The timing of harvest matters—many plants, like lavender, yield the most oil just as blossoms begin to wilt. Most plants should be distilled immediately, but if you need to wait, dry them in a cool, airy place away from sunlight.
Pro tip: For lavender, hang small bundles upside down to dry for 2–4 weeks before storing in airtight containers.
2. Prepare and Clean Your Distillation Equipment
Always start with a clean still or distillation setup. Food-grade cleansers likeProfessional Brewers Wash (PBW)work well for both stainless steel and copper.
3. Add Plant Material and Water
Place whole plant parts (don’t chop too fine or you’ll lose oils) in the still. Add distilled water—enough to cover the plant material, but not so much that it risks boiling over.
4. Heat and Distill
Heat the still until the water boils. Once boiling, turn on the condenser (if your setup has one) and watch as steam carries the essential oils out through the drip-arm. Keep an eye on water levels so the still never runs dry.
5. Collect and Separate
Direct the distillate into a separatory funnel. Allow the mixture to settle—oil will float above the hydrosol (floral water). After 12 hours or so, drain each into separate containers.
6. Store Properly
Pour your essential oil into airtight, tinted glass bottles, leaving minimal air space. Store hydrosol in clear glass. Both should be kept cool and dry for maximum shelf life.
7. Clean Up
Rinse the still thoroughly and use a food-safe cleanser to remove any trace oils. For copper, dilute your cleanser to half-strength.
Whether you’re blending ready-made essential oils or venturing into home distillation, taking care with each step ensures your final blend is as potent and pure as possible.
AtPauPack, we supplyready-to-fill oil bottleswith pre-calibrated dropper caps, perfect for beginner aromatherapists and boutique brands.
Essential Oil Safety: What You Need to Know
Aromatherapy is generally safe for most people—especially when inhaled—but a little caution goes a long way. Here are a few key points to keep in mind for safe, enjoyable use:
-
Stick to inhalation or diffusion.Simply smelling essential oils or using a diffuser poses very little risk for most people. The aromas may be strong, but typically, this is perfectly fine.
-
Dilute before you touch.If you’re thinking of applying essential oils to your skin, always dilute with a carrier oil like jojoba, almond, or coconut. Aim for a 1–5% essential oil blend—think of it as a tiny splash in a big pool.
-
Patch test first.Before spreading any blend over a large area, dab a diluted drop on a small patch of skin. If you notice any redness, irritation, or discomfort, hold off and try a different oil.
-
Watch out for sensitive groups.Children, pregnant or nursing individuals, and those with sensitive skin should use extra caution—or better yet, check with a healthcare provider before applying oils topically.
-
Pay attention to individual reactions.Scents are personal. If you (or anyone in your household) get a headache, feel agitated, or dislike a scent, tuck that bottle away.
-
Special care with certain oils.Oils like oregano, cinnamon bark, jasmine, lemongrass, ylang-ylang, chamomile, and bergamot can be more likely to irritate, so consider starting with milder options if you’re new to aromatherapy.
-
Never ingest essential oils.No matter how delicious they smell, these oils are for smelling—not eating.
-
Store wisely.Keep oils in dark glass bottles (like those fromPauPack), away from heat sources and sunlight, to preserve their potency and prevent mishaps—remember, essential oils are flammable.
By following these simple guidelines, you can enjoy the benefits of aromatherapy while keeping yourself and your loved ones safe.
Is Aromatherapy Generally Safe?
For most people, aromatherapy is quite safe—especially when you stick to simply enjoying the scent of essential oils in a diffuser or on a tissue. Breathing in those calming scents (think lavender, eucalyptus, or citrus) is very low risk.
However, essential oils are potent, concentrated plant extracts. If you plan to apply them to your skin, it’s important to dilute properly with a carrier oil and perform a patch test first—because everyone’s sensitivity level is a little different. Direct, undiluted use can sometimes cause irritation or allergic reactions, particularly for those with very sensitive skin or existing respiratory issues.
Serious adverse reactions are rare, but if you notice any unusual symptoms—such as rashes, trouble breathing, or dizziness—stop using the blend immediately and consult a healthcare professional.
In short, enjoy the benefits but treat essential oils with the respect they deserve. Store them safely away from children and pets, and always follow recommended guidelines for dilution and application.
Seasonal Aromatherapy Blends: Bring the Holidays Home
Looking to evoke a hint of festive spirit with your blends? You’re in luck—seasonal aromatherapy is all about cozy, nostalgic notes.
For holiday-inspired aroma:
Try combining orange, cinnamon, cardamom, and clove essential oils. Here’s a simple starting point:
- 3 drops orange oil
- 2 drops cinnamon oil
- 2 drops cardamom oil
- 2 drops clove oil
Mix these oils together before adding them to your carrier oil (following the dilution ratio above). The result is a warm, spicy, and inviting scent that instantly fills your space with holiday cheer—perfect for diffusers, roll-ons, or even a quick aromatherapy inhaler.
Experiment with ratios to match your personal preferences. And don’t forget to label your seasonal masterpieces for easy recreating next year!
Enjoying Aromatherapy Without a Diffuser
No diffuser? No problem—there are plenty of simple ways to experience the benefits of essential oils, right at home or on the go.
Simple Alternatives for Aromatherapy:
-
Cotton Ball Method:Add a few drops of your chosen essential oil to a clean cotton ball. Place it nearby (on your desk, nightstand, or in your gym bag) for a gentle aroma throughout your day. For a quick pick-me-up, you can simply hold the cotton ball close and inhale.
-
Steam Inhalation:Feeling stuffy or need a calming moment? Fill a bowl with hot (not boiling) water, and add 2–3 drops of essential oil. Lean over the bowl, drape a towel over your head to trap the steam, and inhale deeply for a few minutes. It’s soothing for both your senses and your sinuses.
-
Wearable Diffusers:Aromatherapy jewelry—like lava bead bracelets or clay pendants—make it easy to carry your favorite scent with you. Just add 1–2 drops onto the porous beads, let them absorb, and enjoy a slow release of fragrance throughout your busy day.
-
Direct Inhalation:If you’re short on time, simply uncap your essential oil bottle and take a gentle whiff. It doesn’t get easier than that!
These quick DIY methods are perfect for moments when you want the benefits of aromatherapy—minus the equipment.
Can you create a DIY fragrance diffuser at home?
Absolutely—making a homemade diffuser is simple and requires just a few basic supplies you may already have.
What you’ll need:
- A glass container with a narrow neck (think: bud vase, small bottle, or even a lab flask)
- 5–10 rattan reeds or bamboo skewers
- Your favorite essential oils
- A neutral carrier oil (fractionated coconut, sweet almond, or safflower all work well)
How to assemble:
- Mix your oils: Combine your carrier oil with your chosen essential oils. A common starting ratio is about 70% carrier oil to 30% essential oil, but you can adjust the strength to your liking.
- Fill the bottle: Pour your oil blend into the container, filling it roughly halfway.
- Add the reeds or skewers: Place the reeds into the bottle, ensuring the ends are submerged.
- Diffuse and enjoy: The oils wick up through the reeds and gradually scent your space. For best results, flip the reeds upside down every week to refresh the aroma.
No glass container on hand?Glazed ceramic vessels work in a pinch, as long as they’re non-porous and watertight.
Voilà! You have a personalized diffuser—no electricity, no fuss.
What is the 30 50 20 rule for essential oils?
Fragrance harmony starts with structure.
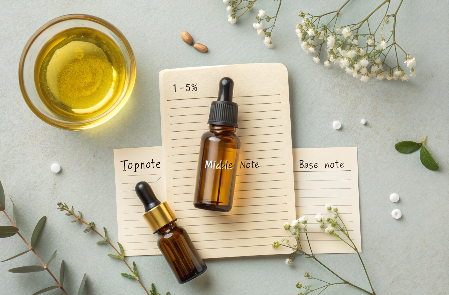
The 30/50/20 rule helps balance an essential oil blend: 30% top notes, 50% middle notes, and 20% base notes. This creates a scent that opens well, lingers, and grounds.
Dive Deeper: Understanding Each Note
| Note Type | Characteristics | Common Oils |
|---|---|---|
| Top (30%) | Light, sharp, evaporate fast | Lemon, peppermint, eucalyptus |
| Middle (50%) | Heart of the blend | Lavender, geranium, rosemary |
| Base (20%) | Heavy, grounding, long-lasting | Patchouli, cedarwood, sandalwood |
Example (10-drop blend):
-
3 drops orange (top)
-
5 drops lavender (middle)
-
2 drops vetiver (base)
Add this blend to 10ml of carrier oil for a 5% dilution—ideal for pulse-point rollers or massage oils.
At PauPack, we help clientsdesign blend templatesand createpre-filled 10ml roll-onswith balanced fragrance profiles.
How are aromatherapy oils made?
Some are blended, some are extracted—it depends on the type.
Aromatherapy oils are made by either extracting essential oils from plants or blending those oils with carriers to create ready-to-use products.
Dive Deeper: Two Categories
-
1.Essential Oils (Pure)
- Extracted from plants (flowers, leaves, peels)
- Methods: steam distillation, cold pressing
Some botanicals store their essential oil within their leaves or flowers, while others keep the oil tucked away in their rinds, seeds, or even roots. For example, citrus oils likeorangeandlemonare pressed from the fruit’s peels, whereas floral oils such aslavenderare distilled from the blossoms. The part of the plant used determines both the extraction method and the oil’s unique properties, making each essential oil distinct in aroma and benefit.
Why harvest timing and technique matters
It’s not just what you distill—it’s when and how you pick it.
The timing and care taken during plant harvest have a huge impact on both the yield and quality of the essential oils you’ll get.Each plant species produces its highest essential oil content at specific points in its growth, so harvesting too early or too late can mean less fragrance and fewer active compounds.
Handle with a light touch:
- Pick the correct plant part (petals, leaves, peels, etc.)
- Harvest at the optimal stage—often early morning, when compounds are most concentrated
- Avoid bruising or crushing, which can cause valuable oils to evaporate or degrade
A little research goes a long way. Check reputable sources (like theInternational Federation of Essential Oils and Aroma Tradesor publications from distillers such asMountain Rose Herbs) to pinpoint the ideal harvest window for your botanicals. Good technique preserves both potency and aroma, ensuring your final blend is as vibrant and therapeutic as possible.
2.Aromatherapy Blends
-
Mixed with a carrier (e.g., jojoba)
-
Used directly on skin, in roll-ons, or massage oil
AtPauPack, we manufacture and packagecustom aromatherapy blendsfor beauty, spa, and wellness clients—offering bothbulk oil solutionsandretail-ready formats.

How do I extract essential oils?
It’s complex—but possible at a small scale.
Essential oils are extracted from plants using steam distillation, cold pressing, or solvent extraction, depending on the botanical.
Should You Cut or Chop Plant Material Before Distillation?
Keep plant material whole for best results. While it might be tempting to chop or shred botanicals before distilling, this can actually cause you to lose valuable oils before extraction even begins. Cutting exposes more surface area, allowing delicate aromatic compounds to evaporate or stick to your tools.
Instead, load the whole leaves, petals, or peels directly into your still. This helps preserve the maximum amount of essential oil, ensuring a richer, more aromatic final product. For roots or very dense materials, a gentle break (not a fine chop) may be needed, but always err on the side of keeping pieces as intact as possible.
Dive Deeper: Common Extraction Methods
| Method | Ideal For | How It Works |
|---|---|---|
| Steam Distillation | Herbs, flowers | Steam pulls volatile oils from plant matter |
| Cold Pressing | Citrus peels | Pressing releases oil without heat |
| Solvent Extraction | Delicate florals | Uses alcohols or hexane (not DIY-safe) |
Exploring Home Essential Oil Distiller Systems
If you're intrigued by the idea of making your own essential oils at home, a distiller can help you extract plant essences safely and efficiently. There are two main types of electrical distillers designed for home use—both offering different advantages depending on your goals and setup.
1. 120-Volt Essential Oil Distillers
Best for beginners and smaller batches, 120v distillers are plug-and-play systems that work with standard household outlets. Here’s why people like them:
- Simple Setup: Just plug into your kitchen outlet and you’re ready to start.
- Perfect for Hobbyists: Ideal if you’re experimenting with small harvests or want to try making lavender or peppermint oil in limited quantities.
- Affordable & Accessible: Lower upfront cost and easy to find.
Considerations:
These systems heat up and extract more slowly, so patience is required. They’re not designed for producing big batches—and won’t keep up if you plan to distill gallons at a time.
2. 240-Volt Essential Oil Distillers
If you're looking for faster results or need to process larger amounts (hello, ambitious gardeners), a 240v system is worth considering. Here’s what sets them apart:
- More Power, Faster Extraction: Reach distillation temperatures quickly and extract oils efficiently, especially during big harvests.
- Larger Volume: Great if you’re making essential oils for friends and family, or growing your own botanicals at scale.
- Commercial-Grade Results: Higher yields in less time—meaning you can run multiple cycles in a single day.
Considerations:
You’ll need access to a 240v outlet (such as a dryer outlet) and possibly help from an electrician for setup. These systems are more of an investment, both in terms of price and electricity.
Distillation Tips for Success
- Regularly inspect your distiller for safe operation and optimal performance.
- Always ensure your system has adequate water to protect the heating element.
- Adjust temperature and power settings as needed to avoid losing precious steam from the condenser.
Whether you're starting small with a 120v plug-in model or scaling up to a 240v setup for garden-sized projects, modern distillers from reputable brands likeStill Spirits,Vevor, andAlambicmake home extraction accessible.
DIY extraction is possible using ahomemade still, but commercial-grade oils are more consistent, safer, and cost-effective for most users.
AtPauPack, we sourceISO-certified essential oilsfrom trusted global suppliers and offer private-label services for custom aromatherapy lines.
Key Factors for Successful Essential Oil Distillation at Home
Good distillation starts long before you flip the switch on your still. Here’s how to set yourself up for quality results—whether you’re a hobbyist or considering small-batch production.
1. Harvesting at the Right Time
- The timing of your harvest is crucial; essential oil yield and quality peak at particular stages of a plant’s life.
- Research each plant’s best harvest window. For example, cut lavender just as its blooms begin to fade for optimal aroma.
2. Careful Handling and Preparation
- Handle your botanicals gently. Rough handling or harvesting the wrong parts can reduce potency—think of it as preserving the plant’s “character” before its star moment on stage.
- Most fresh plant material should be distilled promptly. If delays are unavoidable, dry your botanicals in small bundles in a cool, well-ventilated place out of direct sunlight. This helps prevent spoilage.
3. Smart Sizing and Storage
- Keep plant pieces as whole as possible. Chopping can release volatile oils prematurely.
- Once dry, store in airtight containers until you’re ready for extraction—just like you’d keep your favorite coffee beans protected from the air.
4. Clean Equipment, Every Time
- Residue from past batches can muddy new oils. Clean your still thoroughly—PBW (Professional Brewers Wash)is a food-grade choice approved for both stainless steel and copper. For copper, dilute it to half strength.
5. Precision With Water and Heat
- Use distilled water for the purest results. Fill your still enough to cover the heating element without risking overflow.
- Monitor heat and maintain steady boiling. Steam distillation is mostly hands-off, but never allow the still to run dry—it’s tough on your equipment and your nerves.
6. Efficient Separation and Storage
- Collect the distillate in a separatory funnel, then let it sit to allow the oil and hydrosol to naturally separate.
- Store essential oils in tinted, airtight glass bottles (think amber or cobalt) and hydrosols in clear glass—both in a cool, dry spot to maximize shelf life.
7. Practice and Patience
- Distillation is as much art as science. Experiment, take notes, adjust—and don’t be discouraged if your first batch isn’t perfect. Each plant, season, and session will teach you more.
With these essentials in mind, you can extract pure, aromatic oils that rival many commercial offerings—whether for your own blends or boutique products.
What to Do If You React Badly to Essential Oils
While adverse reactions to essential oils are uncommon, it’s important to listen to your body. If you notice any irritation, difficulty breathing, or other unusual symptoms after using an oil,discontinue use immediately.
In the case of severe symptoms—such as trouble breathing, swelling, or a serious rash—seek medical attention right away. It’s always better to err on the side of caution. Remember, even natural products can cause sensitivities, so patch testing and moderation are key to safe aromatherapy.
A Note on Safety: Why You Shouldn’t Ingest Essential Oils
As tempting as it may be to sample that citrusy aroma,essential oils are extremely concentratedand can be toxic if swallowed. Ingesting even small amounts may cause nausea, digestive distress, or more serious reactions—unlike their use in a diffuser or topical blend.
Because essential oils are not regulated as food-grade products and often require expert formulation for safe internal use, it’s best to enjoy their benefits through inhalation or diluted topical applications only. Stick to sniffing, not sipping—your body will thank you!
Individual Reactions: What to Expect
Not everyone experiences essential oils the same way—and that’s perfectly normal.
Reactions can range from delight to discomfort, depending on the oil and the individual’s sensitivity.For some, the aroma is uplifting or soothing. For others, especially those with sensitivities, a strong scent may lead to headaches or irritation. It’s also worth noting that children are often more sensitive than adults when it comes to essential oil exposure—if a little one objects to a scent, simply switch the diffuser off.
Certain oils—like oregano, cinnamon bark, jasmine, lemongrass, ylang-ylang, chamomile, and bergamot—tend to provoke stronger responses in some people.
Safety tip:If you or anyone in your space feels uneasy or notices any adverse effects, take a break from using that oil. Essential oils work best when they enhance your well-being, not detract from it.
What are the potential risks or side effects of aromatherapy?
Aromatherapy is generally safe when enjoyed responsibly, especially when simply inhaling essential oils through a diffuser or a cotton ball. Yet, like any wellness practice, it isn’t completely without risks—and there are a few important safety notes to keep in mind.
Individual Sensitivities and Reactions
Everyone processes scents differently. What’s a calming lavender cloud to one person might bring on a headache, irritation, or even agitation for someone else—especially if you’re sniffing oils directly or in a small, unventilated space.
- Some oils—like oregano, cinnamon bark, jasmine, lemongrass, ylang-ylang, chamomile, and bergamot—are notorious for being a bit more irritating and may not agree with everyone.
- Children, in particular, tend to react more strongly than adults. If anyone in your home complains about a scent, it’s wise to turn off the diffuser and air out the room.
Topical Use: Proceed with Caution
While many people enjoy applying diluted essential oils to their skin, this is where risk rises. Essential oils are highly concentrated, and undiluted application can cause skin irritation, allergic reactions, or dermatitis—even in people who usually don’t have sensitive skin.
- Always dilute:Blend essential oils with a carrier oil (think jojoba, coconut, or olive) so that the essential oil makes up only 1-5% of the total mixture.
- Perform a patch test:Try a small amount on one spot before broader application.
- Use extra caution if you’re pregnant, breastfeeding, or considering use on children. The effects of topical oils in these groups aren’t well studied, so it’s best to avoid.
Important Warnings
- Never ingest essential oils.No matter how lovely they smell, consuming them can be dangerous.
- Don’t apply undiluted essential oils directly to skin—their potency can cause burns or severe irritation.
- Store with care:Keep oils away from direct sunlight and heat sources. Essential oils are flammable.
- Read labels & directions:Some oils have specific storage or usage instructions to ensure safety.
In short: enjoy aromatherapy, but always use common sense and treat these highly concentrated plant extracts with respect. If you or anyone nearby experiences negative effects, discontinue use and consult a healthcare provider if necessary.
Are Children More Sensitive to Essential Oils Than Adults?
Yes—children can be more sensitive to essential oils than adults.
Kids often react to strong scents more intensely, and essential oils can sometimes trigger discomfort, headaches, or irritation. If a child finds a particular aroma overwhelming, it’s best to stop diffusion and ensure plenty of fresh air. Always dilute oils well and introduce any new aroma gently around little noses.
As a general rule: when in doubt, opt for gentler botanicals and monitor closely for any adverse reactions.
Conclusion
Making aromatherapy oils is simple with the right essential oils, carrier, and balance. Use the 30/50/20 rule, stick to safe dilutions, and store in dark glass. AtPauPack, we help you craft and scale your blends—from custom packaging to full white-label production.
For best results, always store your finished oils in airtight, tinted glass containers, leaving as little headroom as possible to reduce oxidation. If you’re working with hydrosols, clear glass is fine, but both should be kept in a cool, dry place to maximize shelf life and preserve aromatic potency.